

(Family Features) In cities across the country, vibrantly hued murals are often created to bring color and life to buildings, community gathering places and more.
The bold energy of large-scale murals, like one created by mural artist Matt W. Moore with the help of Scotch Painter’s Tape, reflects a growing trend toward a more adventurous design. It’s a style that you can easily adapt and make your own with existing decor elements that are already in your home. Explore these ideas to help spark creativity for your next project.
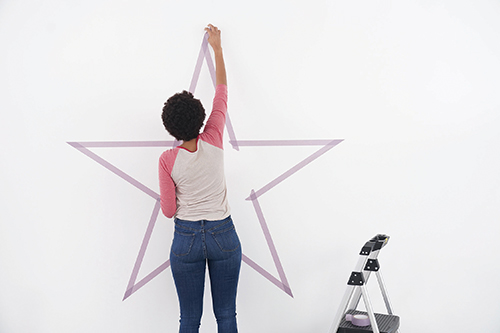
Make a statement
There was a time when it was considered daring to paint one wall in a room a different color. However, these days, statement walls are replacing the more subtle accent wall. A wall filled with geometric shapes or a colorful pattern is an eye-catching enhancement that can be added to just about any space.
Generally, the wall you use should be the natural focal point of the room. Be conscious of architectural details that may distract from the design. Doors and fixtures like fireplaces can be incorporated or worked around, but windows are usually too disruptive, so it’s best to avoid if at all possible.
Although the idea is to create a stand-out feature, keep colors in line with the rest of the room to maintain a sense of cohesiveness. Similarly, avoid overcrowding the room with furnishings and intricate wall art that will take the attention away from your statement wall.
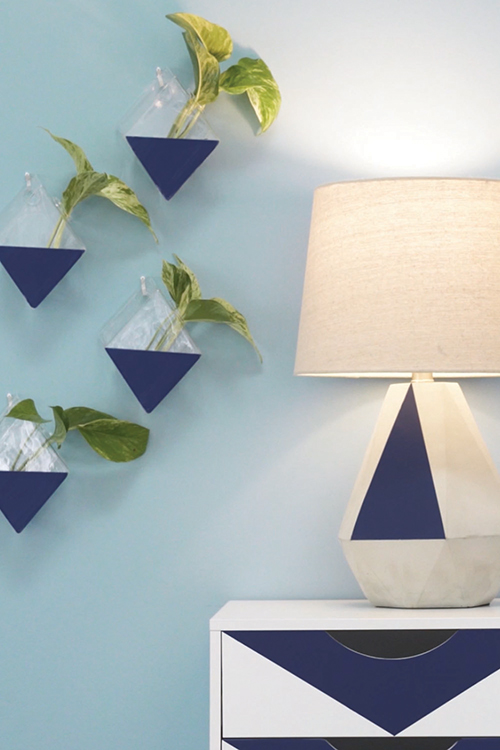
Revamp furniture
Refinishing old furniture is an affordable way to outfit a newly designed room. For an on-trend look, invite some visual interest with patterns. You might choose a single color stripe to contrast a lighter or darker hue, or create a pattern using shapes like circles or diamonds.
Tables are especially well-suited for creative painting, but don’t limit yourself. Wooden seating can also be an attractive option. If you’re painting the seat, it’s a good idea to add a protective coat after the paint design is dry to reduce wear.
Another option: paint a piece such as a buffet or armoire a solid color in a standout shade then use white or another soft color to create patterns on the door or drawer panels.
Consider accent pieces
Paint embellishment doesn’t have to be limited to hard surfaces; textiles can also benefit from a bold paint makeover. Accent pieces like pillows, lamp shades or rugs are easy places to add colorful designs on a small scale that can easily be swapped out if and when you’re ready for a new look.
Be sure to use paint suitable for fabric. Before diving into the full project, it’s a good idea to test a small spot to determine how the material will react to the paint. Some fabrics will soak up or bleed the paint, and while this effect has an artistic merit of its own, you’ll want to have a sense of the finished look to ensure you can achieve the design you want.
Tools of the Trade
Before starting any paint project, set yourself up for success by gathering all the tools you’ll need:
Brushes or rollers: The tool you use to apply paint will have a significant impact on the finished look, so investing in quality brushes or rollers can make a noticeable difference.
Roller tray: If your project calls for a roller brush then a tray is necessary to allow for even distribution of paint across the roller and more even application. Consider investing in inexpensive tray liners that can be thrown away when the job is complete to help make cleanup easier.
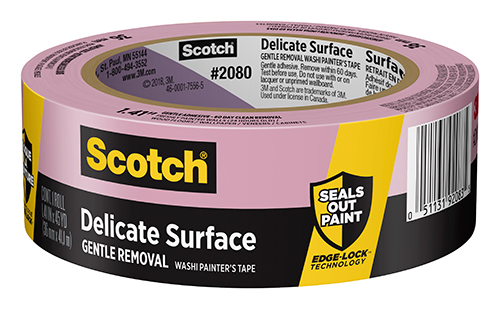
Painter’s tape: While every job is unique, they all start the same way – preparation. Before starting any painting project, it’s important that you’re choosing the right tape for your job, so you end up with a better result. For more sensitive projects like geometric shapes and stripes, consider an option like Scotch Delicate Surface Painter’s Tape that seals out paint while delivering sharp lines and a clean removal. This tape is ideal on surfaces that require a little extra care, such as wood floors, wallpaper, cabinets, painted drywall and freshly painted walls.
Painter’s plastic: Protect large surrounding areas like the floor and furnishings with plastic coverings to prevent unwanted paint drippings. You can also find products that dispense painter’s tape and plastic at the same time, allowing for quicker, easier application than applying each product individually.
Prep your paint project with Scotch Delicate Surface Painter’s Tape
Pro Taping Tips
- Make sure the surface is clean, dry and dust-free so the tape sticks properly.
- Apply tape directly on the surface, pressing down as you go without stretching the tape.
- Press down firmly with a smooth edge, like a putty knife or credit card, to secure the tape.
- Let the tape set for about 30-60 minutes before painting.
- Wait until the paint is dry to the touch before removing the tape.
- Use a putty knife or razor blade to score along the edge of the tape to help prevent cracking along the paint line.
- Lift tape slowly by pulling it back on itself then removing at a 45-degree angle.
Find inspiration at ScotchBrand.com/PaintersTape


